Category Archives: Dessert

Happy 4th and pass the pie!

flagI used to volunteer to work every 4th of July.  There’s a saying we frequently use when referring to the hospital, which is that it’s a “24/7 operation”.  While that may seem like an overly obvious statement to most, to those of us working in healthcare it means two things:  that one shouldn’t feel pressured to finish every little thing before calling it a day (because someone will be coming along after you to continue the work), and second, that everyone is expected to work some holidays.

I quit volunteering to work on the 4th of July, however, when my in-laws retired and made their eastern shore house their permanent home.  The celebration became more of an event after that.  These days, family flies across the country to be there and you can always count on plenty of steamed crabs, fireworks, and beer.

crab pots cracking crabs

tubing fireworks

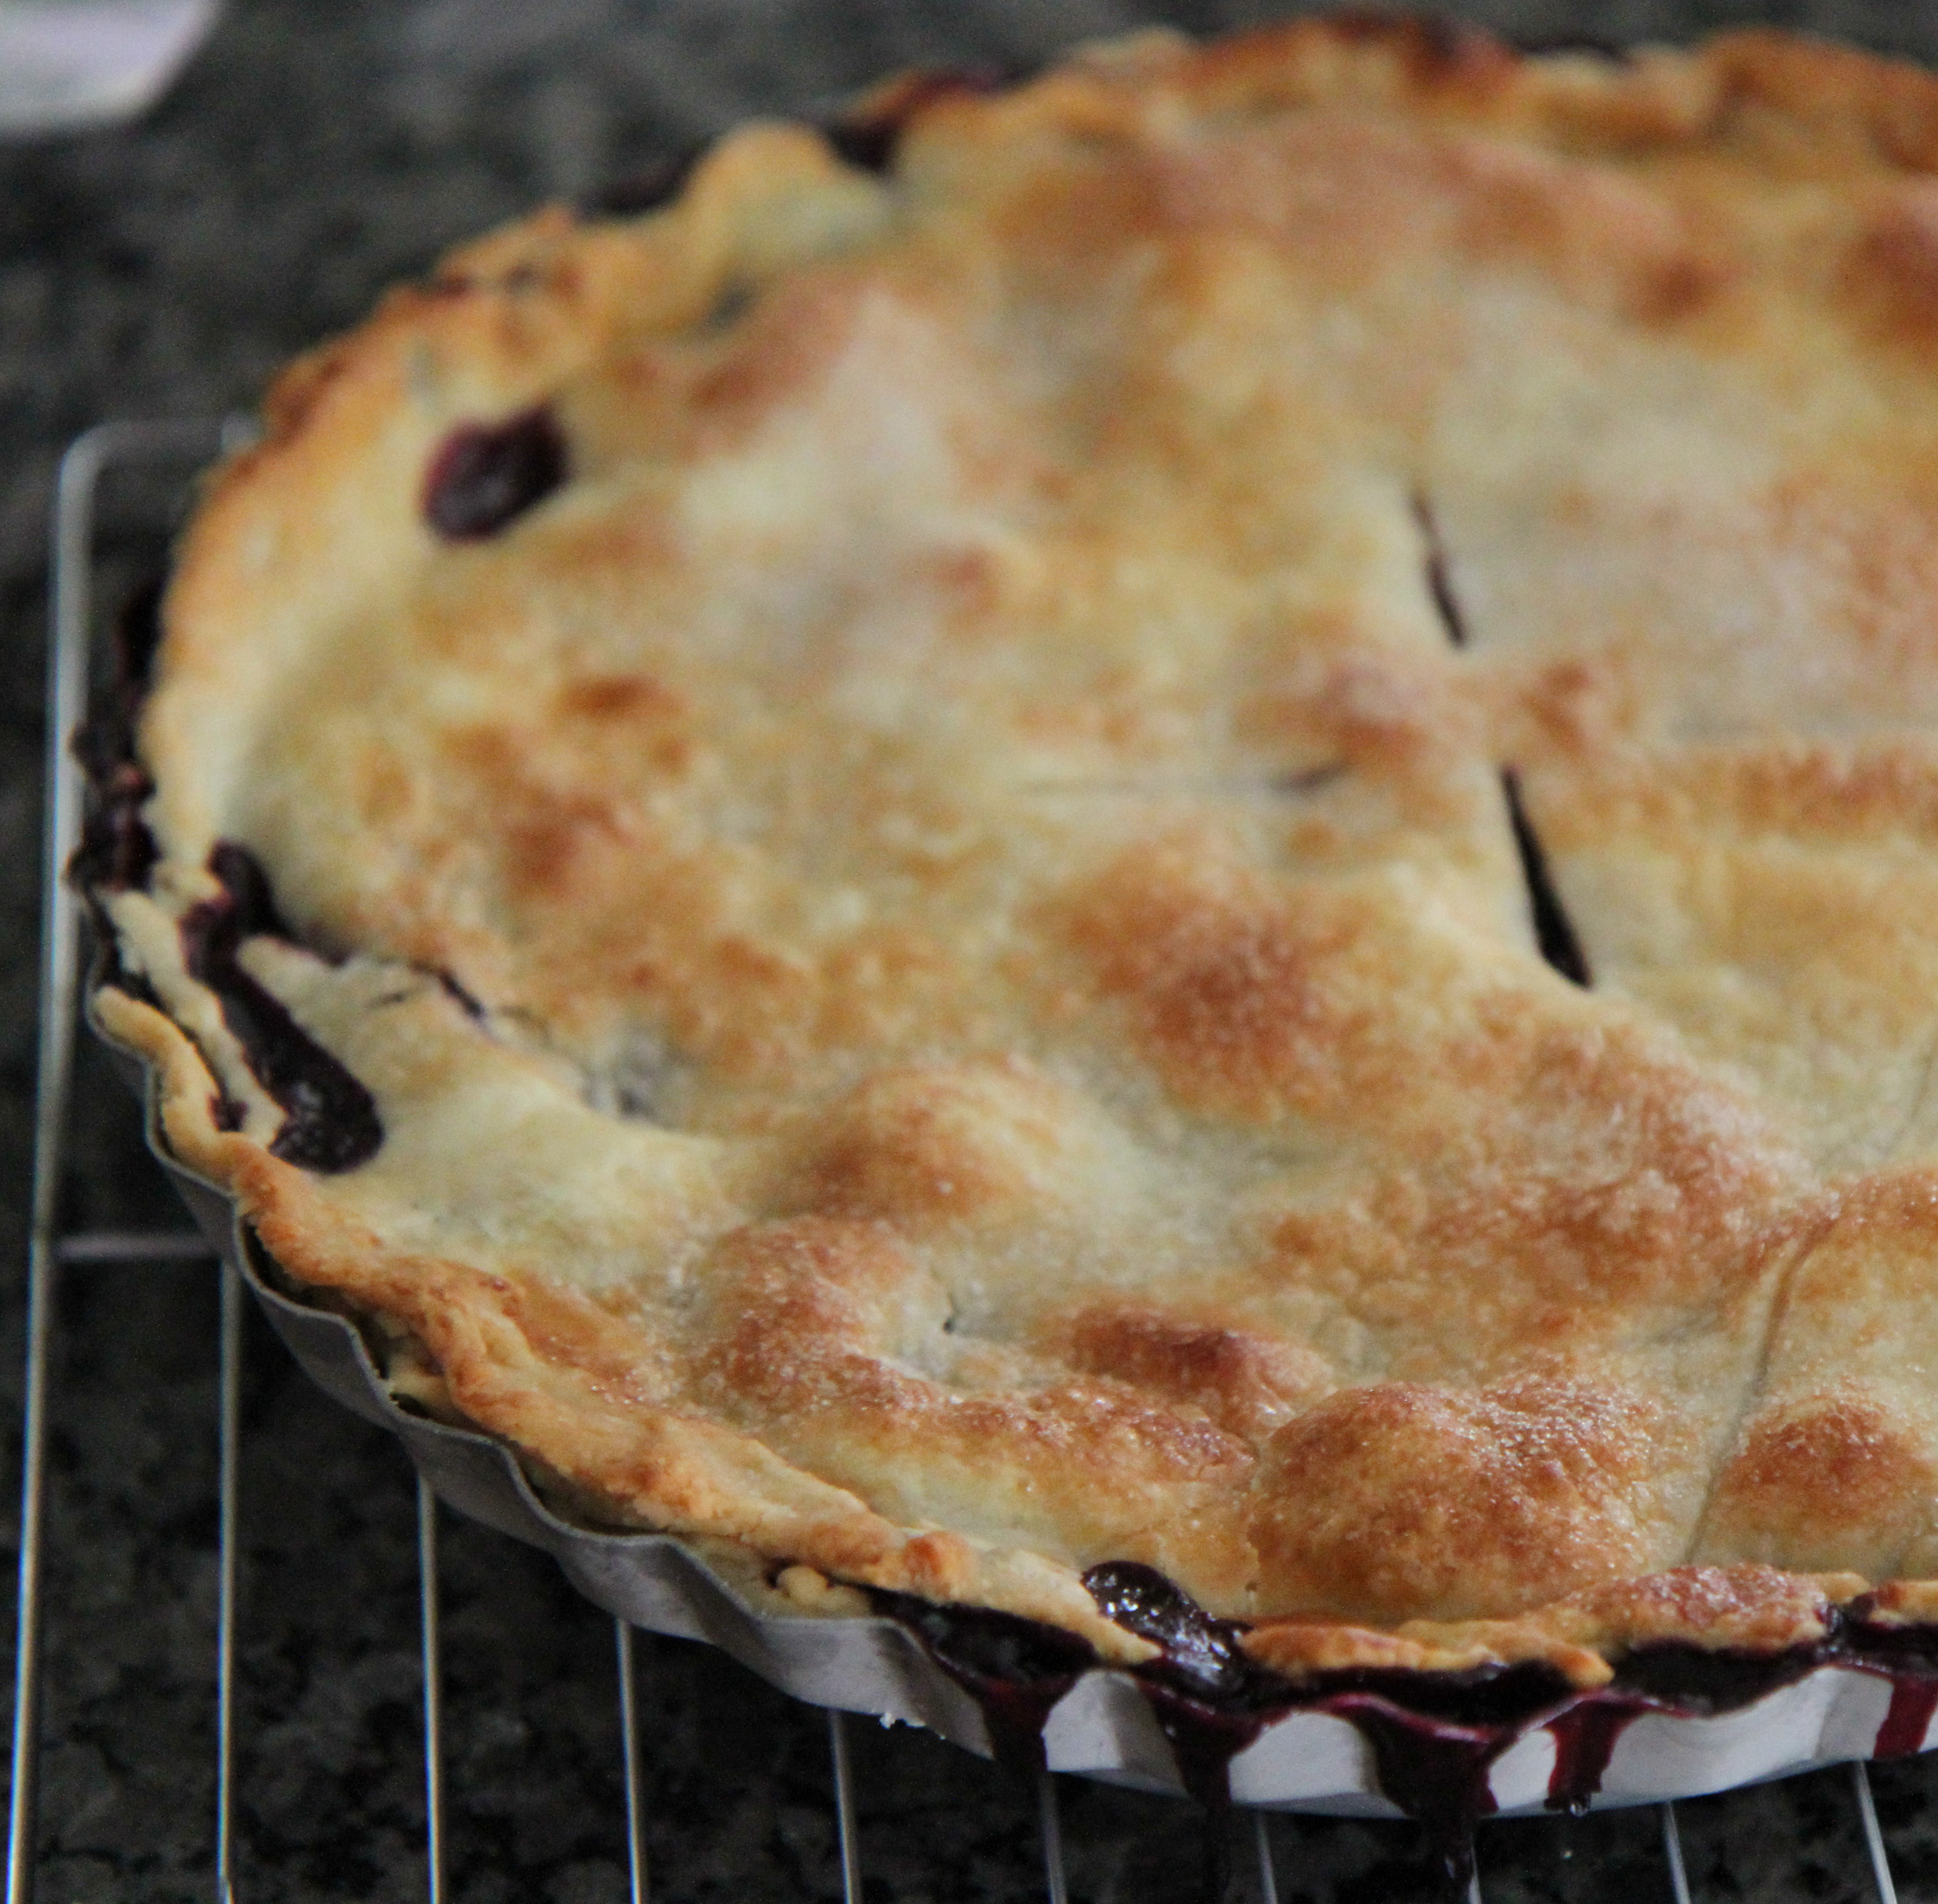
The idea to make this pie to bring to the celebration came about because of an abundance of sweet, plump blueberries from the CSA.  I used a mixture of strawberries and blueberries because that’s what I had on hand, but any combination of berries or single berry will do.  I used Heidi’s pie filling recipe, adapting it only slightly, because I appreciated that it used only brown sugar and promised not to be too sweet.

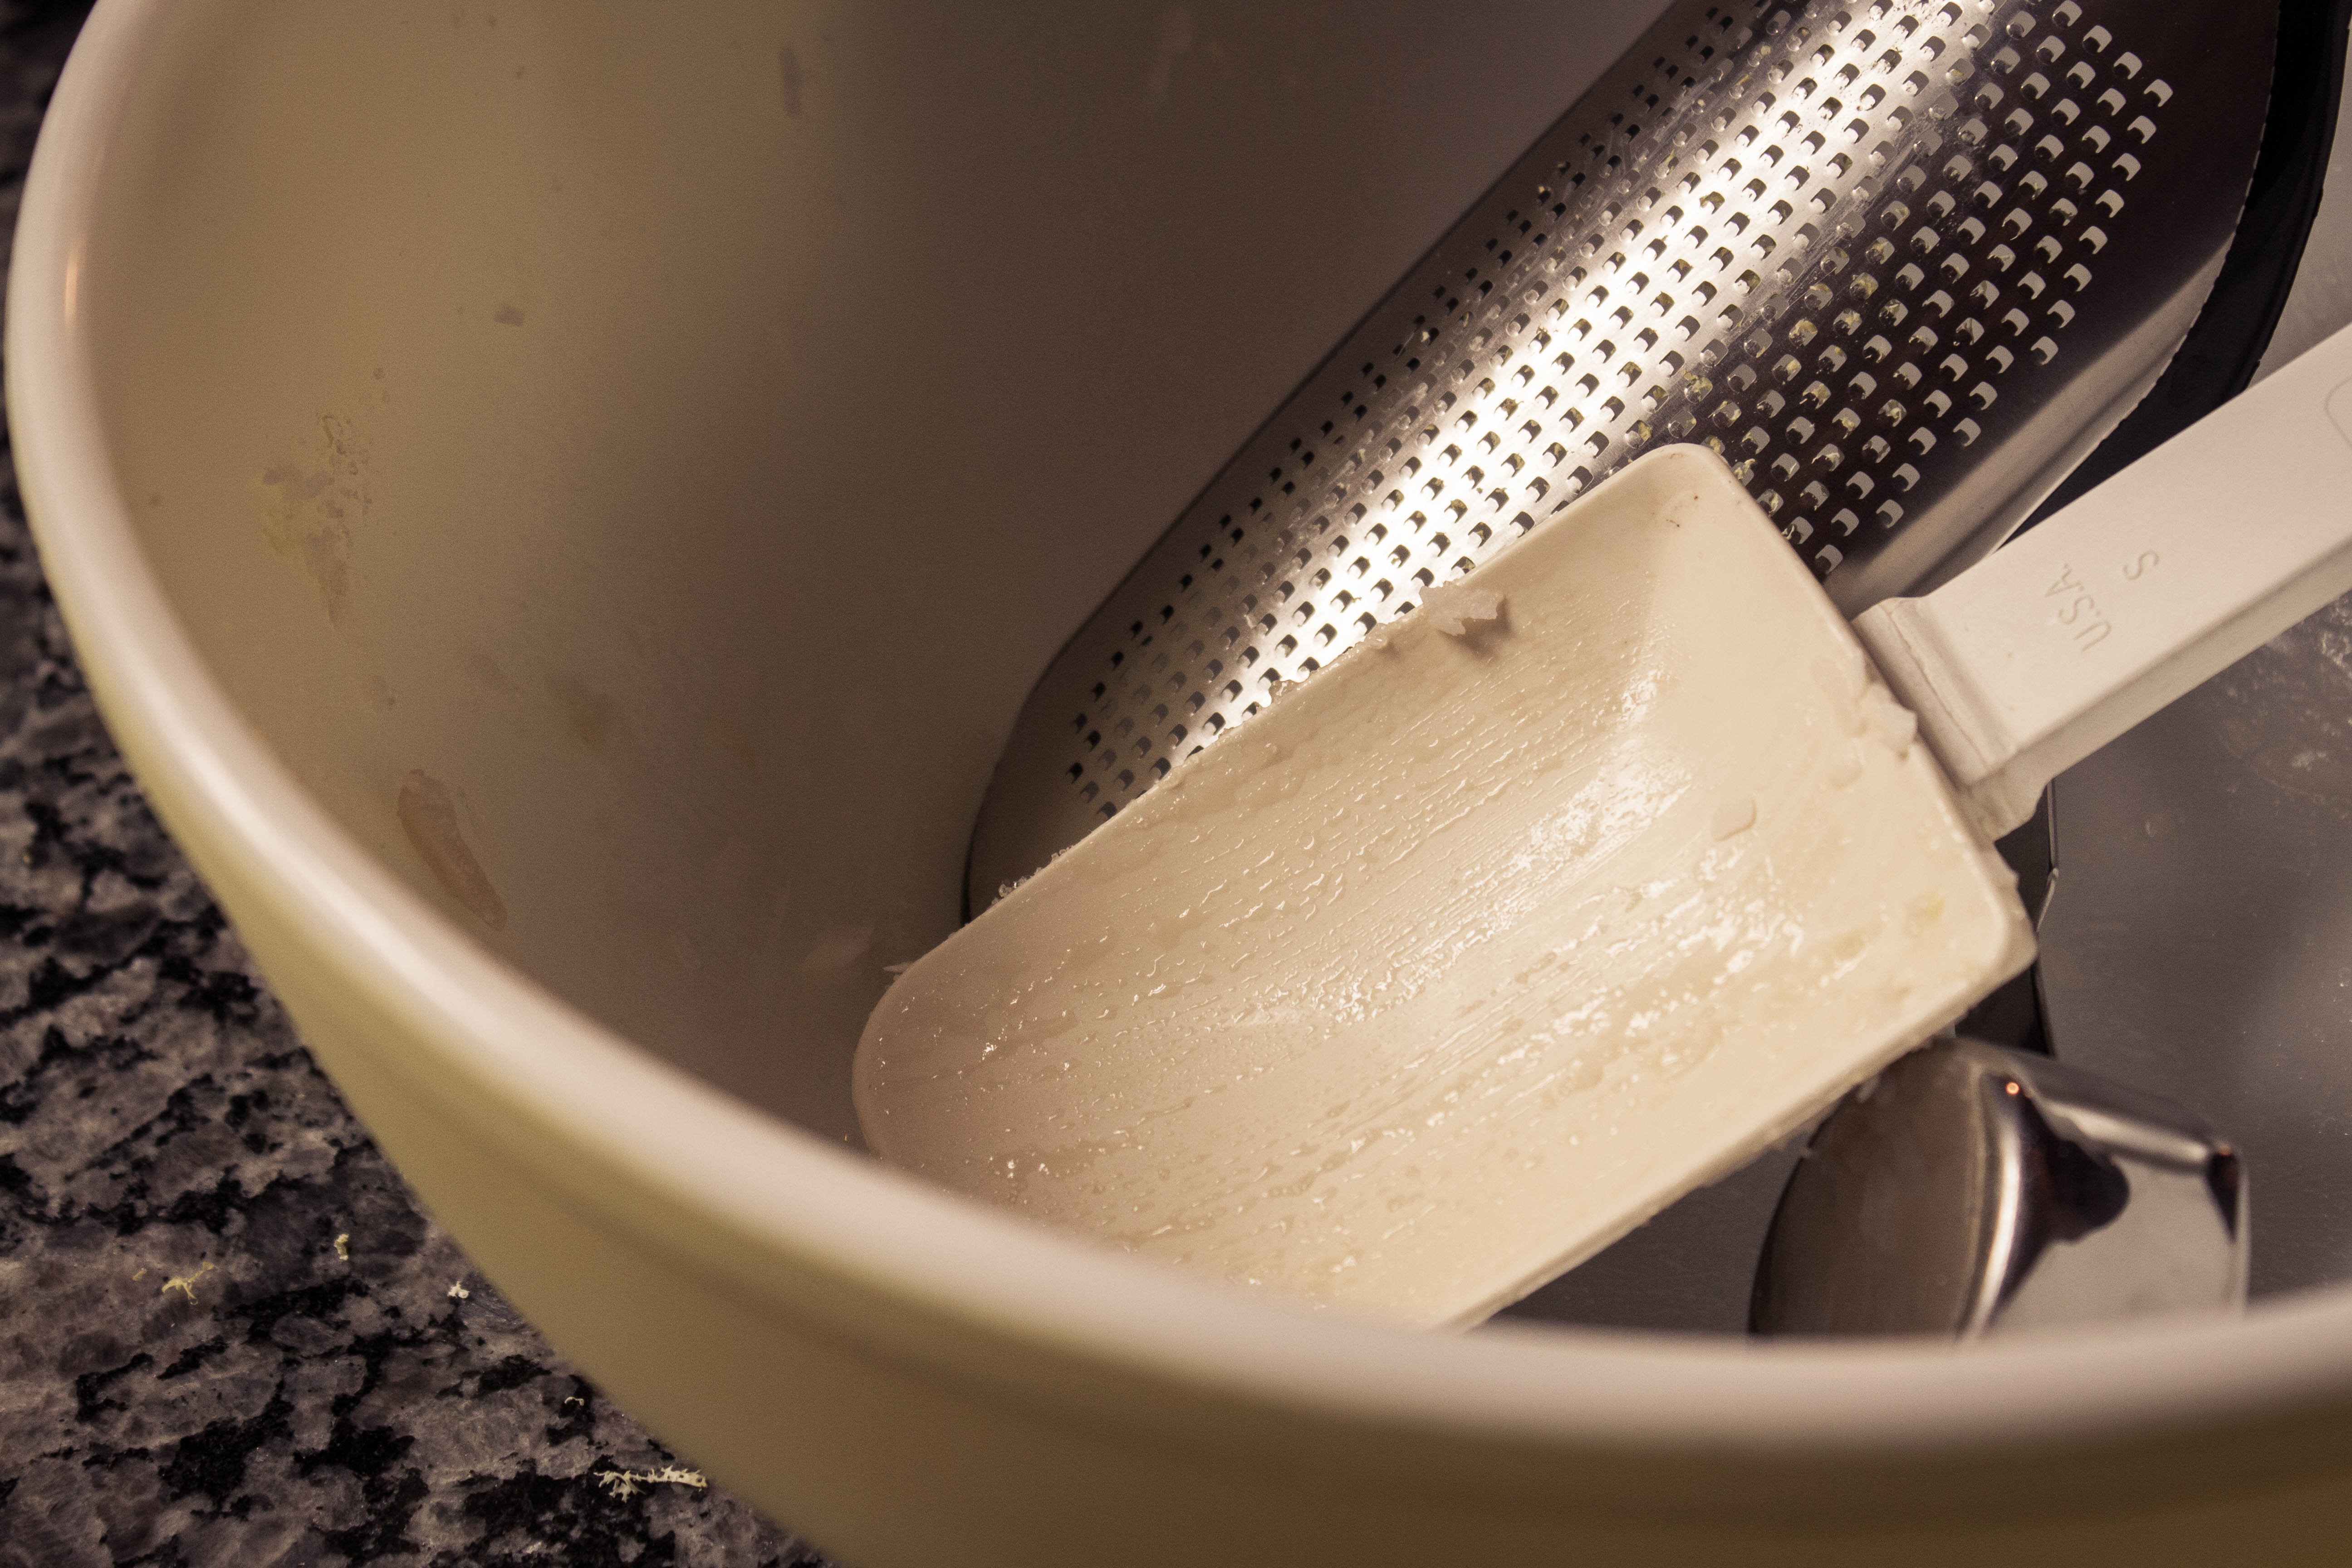
You owe it to the fresh berries to make a homemade pie crust.  This one is quite buttery and flakey, but uses absolutely no lard.  If it’s a little dry (as mine is occasionally), follow the advice of a master, Jacques Pepín, and roll the crust out between two pieces of plastic wrap or parchment.  This should work nicely.

more pieBerry Pie

for the crust:

16 Tbsp. cold, unsalted butter (cut into pieces)

2 1/2 cups all-purpose unbleached flour

1/2 tsp salt

3-10 Tbsp ice water

Place flour and salt in a food processor bowl fitted with a metal blade.  Pulse until  nickel-sized clumps begin to form.  Add 3 Tbsp ice water and pulse again.  Check your dough.  Is it dry?  Does it form a dough ball?  Chances are you will have to add more water.  Add ice water, one Tablespoon at a time, pulsing in between and checking the dough.  You will probably end up adding about 6 Tablespoons or so in total. Pull the dough out and form a ball.  Roll in plastic wrap and chill in refrigerator for at least 30 minutes.

Preheat oven to 375 degrees.

Remove dough from refrigerator and separate into two balls, one slightly larger than the other.  Place the smaller ball back in the fridge until ready to use.  Sprinkle some flour on the counter and place the dough ball on top.  Sprinkle some flour on the dough and roll with rolling pin, rolling 2-3 times, lifting moving the dough, then placing it back down to roll some more.  Frequently moving the dough around while rolling will help keep the dough from sticking to the counter.

Alternatively, a technique I recently began to use is to put a large piece of parchment paper on the counter, sprinkle with flour, put the dough on top of the paper, and place another equally large piece of parchment on top of the dough ball.  Roll your dough out through the parchment to about a 12-inch round.  Don’t worry if it’s not perfect.  Peel back the parchment and use the bottom parchment to lift, flip and center the dough circle over a 9-inch pie tin.  Peel back the bottom piece of parchment and gently push the crust into the form of the pan (save this piece of parchment).  Again, it doesn’t have to be perfect-you can pinch and patch as you go.  Flute the edges of the crust.

Remember that piece of parchment I told you to save?  Lay it across the crust in your pie tin.  Now you need to weigh it down.  You can use a bunch of copper pennies. I liked to use beans,  Make sure they are spread evenly across the bottom of the crust.  Bake the crust until it just starts to turn golden and crisp, about 35 minutes.  Remove from oven and make your filling while it cools.

Turn oven temperature up to 425 degrees.

for the filling:

2 pounds of berries (blueberries, blackberries, huckleberries or any combination.  You may also use a combination of up to one pound of strawberries with a darker berry to equal 2 pounds)

2/3 cup brown sugar

1/3 cup all-purpose, unbleached flour

2 Tbsp fresh squeezed lemon juice

2 Tbsp unsalted butter, cut into small pieces

1/4 tsp salt

1/2 tsp cinnamon

2 sprigs of fresh thyme leaves

1/ cup milk and turbinado sugar (or other large grain or granulated sugar) for sprinkling the crust

Place berries in a large bowl,  add sugar and cinnamon.  Using a fork or a masher, gently mash berries slightly with the sugar to combine.  Fold in the flour and thyme leaves.

Place filling into pre-baked pie crust.  Top with lemon juice and dot with butter pieces.

Roll your top pie dough into a disc as you did the bottom. Gently push the top dough into the crimped edges of the bottom crust.

Using a pastry brush, lightly brush the top of the crust with milk.  Sprinkle with turbinado sugar.  Cut 4 slits in the top of the crust (approximately 3 inches long) to allow steam to escape during baking.

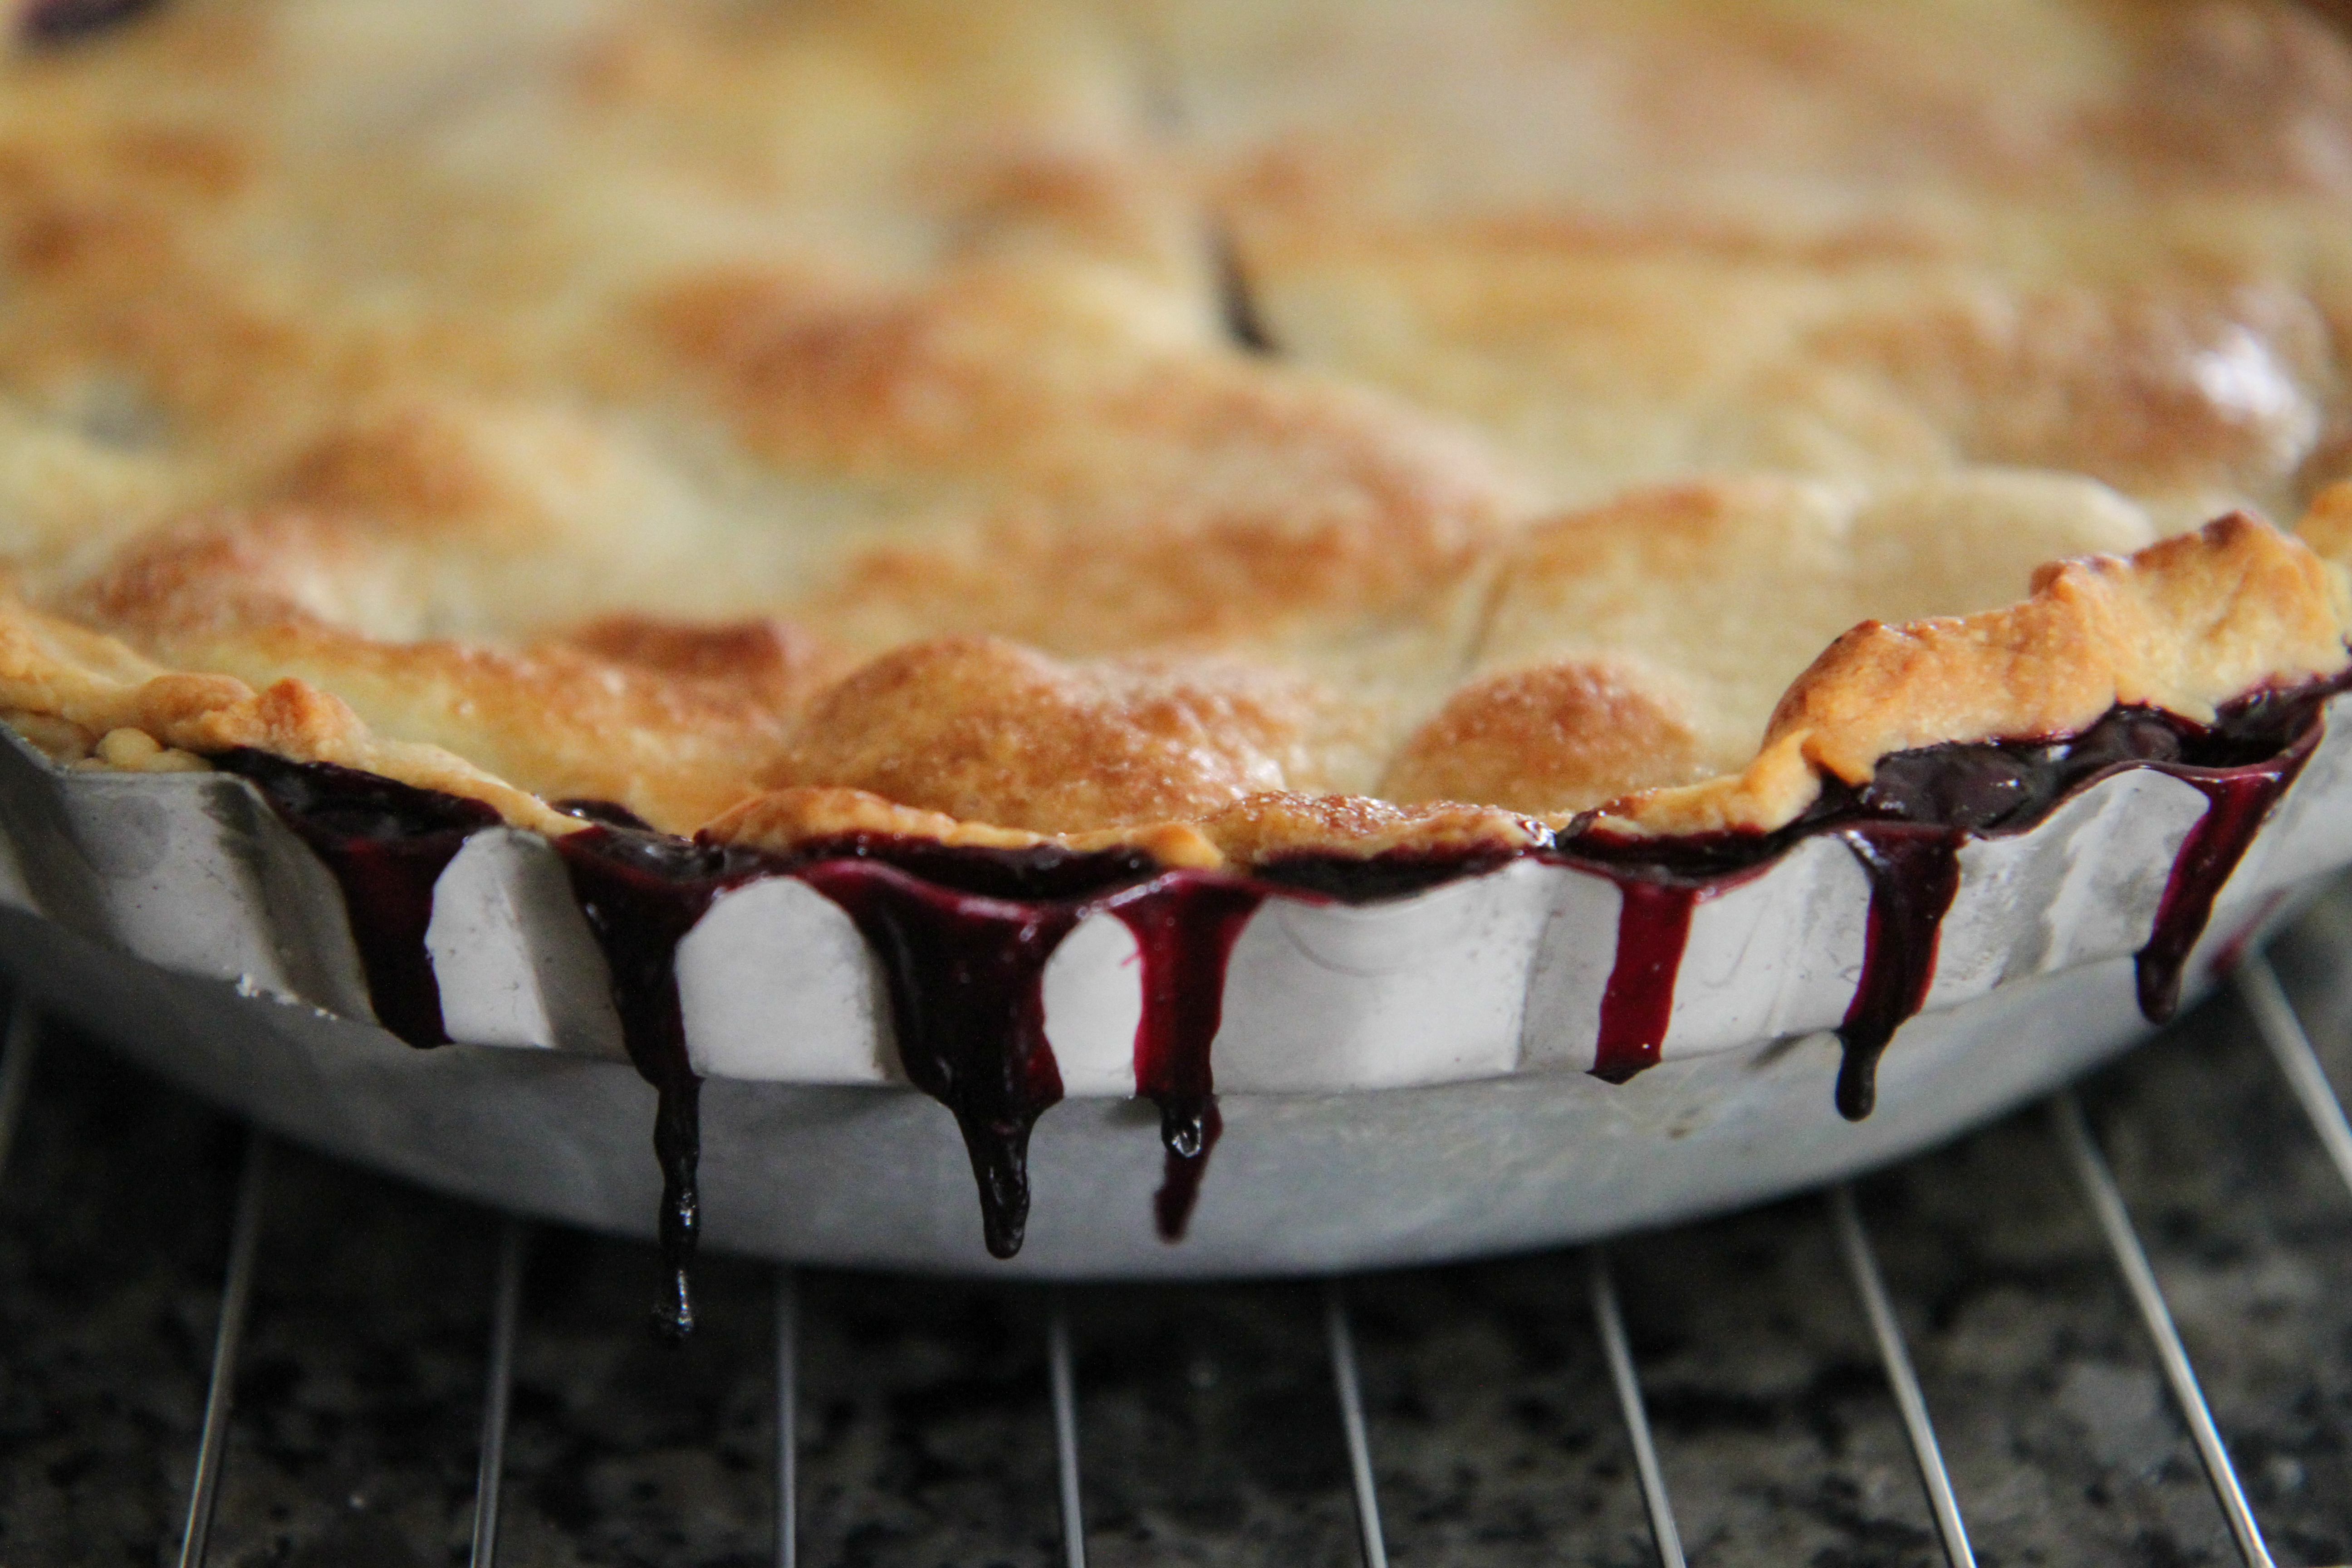
Place pie on middle rack in oven.  NOTE:  You may want to put a cookie sheet lined with foil on the shelf under the rack with the pie to catch the filling if it drips (see my photos).

Check your pie after 25 minutes.  If the outer edge of the crust is browning too quickly, place crimped strips of aluminum foil around the edge and continue baking.

Bake until crust is a deep golden color and filling is bubbling slightly, approximately 45-50 minutes total.

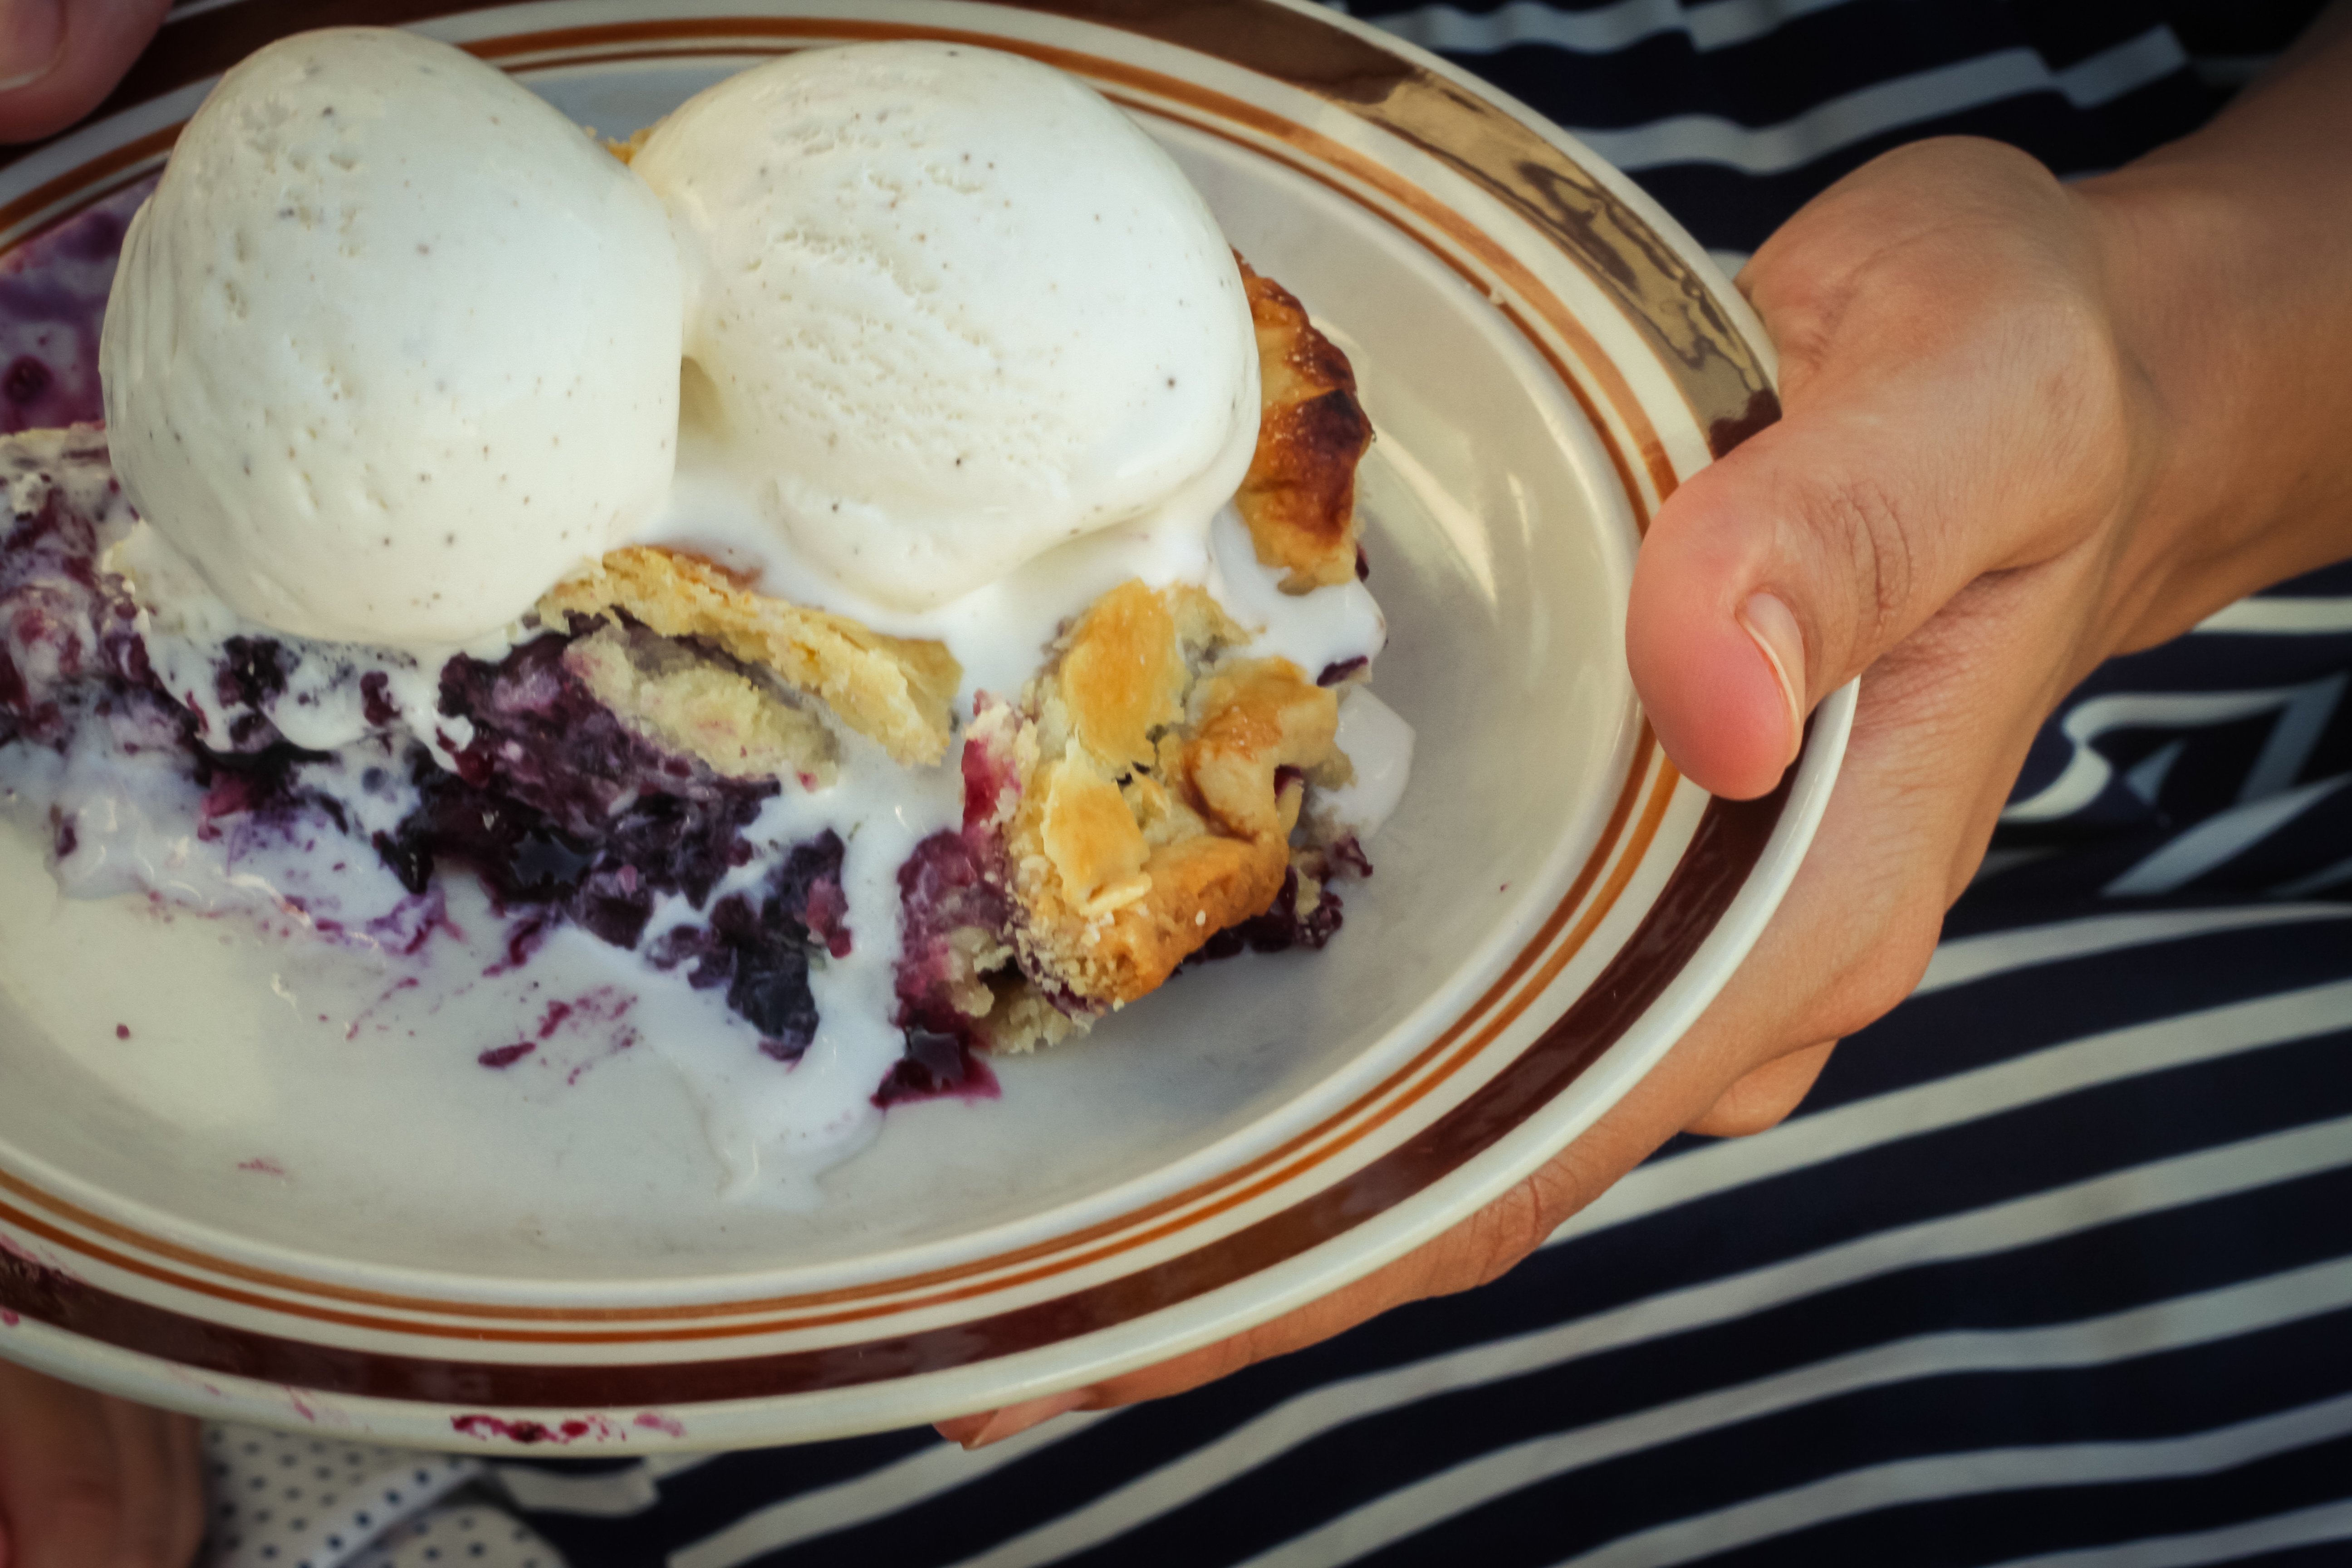
Remove and place on wire rack to cool.  Serve warm or at room temperature.  Will store on countertop up to 3 days.

Lauren eats pie pie berries Amelie eats pie

Coconut mango bites

delicious

When the weather warms up, I’m on the lookout for things I can make for road trips or picnics that travel well and aren’t melty (sorry, chocolate!).  These fit the bill.

The earlier batches I made were a bit wet, so be sure not to soak the mango too long.  You just want it just a little pliable so that it will incorporate with the nuts and coconut.

coconut mango bites (adapted from My New Roots)

makes approximately 20 pieces

2/3 cup cashews (if buying raw, soak in water for four hours.  Drain, rinse, and let nuts dry)

1 cup unsweetened dry mango (read the label to be sure it’s unsweetened.  I purchased mine from MOM’S)

1/2 cup unsweetened coconut, plus more for rolling

1-2 tsp creamed honey (or agave, brown rice syrup, or sweetener of choice)

1/2 tsp vanilla extract

zest of 1/2 lime

pinch of cinnamon

pinch of salt

Place all ingredients except in a food processor and pulse to form a sticky dough.  Spook out dough approximately 1/2 tsp at a time and roll between palms to form a ball. Roll in coconut.  Set in refrigerator to firm up.

cashews

creamed honey dried mango snack

Casey’s chocolate and beet brownies

beet brownies

My son and his friend drifted upstairs from the family room where they had been playing video games.

“It smells so good in here.  What’re you making?” Continue reading

homemade peanut butter cups


I have no memory of my first Reese’s Peanut Butter cup, only that I have always loved them.  Between living a short three hour drive from the Hershey Amusement Park and chocolate factory and having a relative who worked for the Hershey company when I was a kid, our family had a seemingly endless supply of the treats available to us. Continue reading

maple olive oil banana bread

IMG_2640

Remember last week when I talked about how spring is around the corner.  The days have been longer…lighter.  Some bulbs are even beginning to push up through the ground despite no real warming in temperature.

Look what happened this week.  Winter storm Saturn visited us and, while not really depositing any significant snow accumulation, it was enough to close schools and create panic at the grocery stores.

As soon as I saw this recipe on Shutterbean’s web site, I knew I had to make it.  A warm slice with a bit of butter and a cup of chai was the only saving grace on this wet, blustery day.  I don’t know what I love most about this bread.  It could be the fact that it’s not over-the-top sweet like some banana bread recipes, or that it baked up perfectly and evenly every single time.  But no…it’s definitely the insanely simple and delicious  of turbinado sugar and cinnamon that forms a crunchy crust when baked (“you have to figure out how to get the topping throughout the entire bread” says my son).  Done.

We might have eaten two loaves in 48 hours.

Snow has that effect on me.

maple olive oil banana bread (adapted slightly from Shutterbean, originally adapted from Tara O’Brady of UPPERCASE Magazine

Makes one 8 x 4 inch loaf

1 cup all-purpose flour

1/2 cup whole wheat flour

1 tsp baking soda

1 tsp salt

1/2 tsp ground cinnamon

1/4 tsp ground ginger

1/2 cup olive oil

1/2 packed brown sugar

1/4 cup maple syrup

1 1/2 tsp pure vanilla extract

2 eggs

3 ripe bananas, mashed

1/2 cup plain Greek yogurt

for the topping and filling:

4 tsp turbinado or raw sugar

1 tsp ground cinnamon

Preheat oven to 350 degrees.

Butter an 8 x 4 inch loaf pain.  Line the pan with a sling of parchment paper, with the long sides overhanging.  Lightly butter the parchment paper.

Whisk together the dry ingredients in a medium bowl:  both flours, baking soda, salt and spices.  Set aside.

In a large bowl, whisk together the olive oil and brown sugar, breaking up any lumps.  Add the maple syrup and vanilla, whisking until smooth.  Add the eggs and beat or mix with a large spoon or spatula until the eggs are incorporated.  Stir in the bananas, then the yogurt.  Add the flour mixture to the liquid mixture, a little at a time, stirring until just combined.  Don’t over mix.

Pour half the batter into the prepared loaf pan, smoothing if necessary.

Mix turbinado and cinnamon together in a small bowl.  Sprinkle half of this mixture over the batter in the loaf pan.  Pour the other half of the batter into the pan.  Sprinkle the rest of the topping onto the batter.

Bake about 60-70 minutes, or until a toothpick inserted in the middle of the loaf comes out clean.

Remove from oven and leave to cool in the pan for 10 minutes.  Using the parchment paper sling, lift the bread out of the pan.  Remove the parchment and allow to cool completely on a wire rack.

IMG_2621 IMG_2633 banana bread

Be someone’s Valentine

In the opening of the movie, “Eternal Sunshine of the Spotless Mind”, the main character gives the opinion that Valentines Day is a “holiday invented by greeting card companies to make people feel like crap.”

For a long time, I agreed with this sentiment and refused to celebrate.  “I don’t need a declared day to show my love”, I protested.  “I won’t give in to another commercially fabricated holiday”, I cried.

Through the years I softened my view on this a bit.  Valentines Day isn’t just a day for romantic love.  It’s a time when people wonder about the hearts of others and themselves.  If you’ve ever been to a children’s class Valentine party, you’ve no doubt observed how each card exchanged is carefully read and cherished.  People are nicer to each other in general.

A little sweetness is never a bad thing, people, so get on out there and FEEL THE LOVE.

IMG_2500

lemon coconut macaroons

1-14 ounce package flaked coconut, preferable unsweetened

4 large egg whites

1/2 cup slivered almonds

3/4 cup unrefined sugar

1 tsp lemon zest

1/4 tsp salt

Preheat oven to 400 degrees.  Line two large baking sheets with parchment paper.

In a large bowl, combine everything except the egg whites.  Add the egg whites to this mixture, combining well.

Form balls from approximately 2 tsp of dough and drop onto prepared cookie sheet.  You can use a cookie scoop, but I use my hands to shape the balls (this can get a little sticky).  You don’t have to space them much on the cookie sheet, as they will not spread.

Place cookie sheet in oven and bake for approximately 25 minutes or until cookies are set and starting to brown a little on the tops.  Remove from oven and cool completely.

IMG_2481IMG_2492IMG_2493

Side note:  At Christmas time, I make a variation of these cookies called inside-out Almond Joy cookies.  Simply omit the almonds from the mix.  unwrap a bag of Hershey almond kisses and mold the coconut dough around each kiss, forming a ball. Make sure the dough is firmly snug around the kiss.  Bake at 400 degrees for 20-25 minutes.

Date Nut Bites

Image

  Hello Fiercely Fresh readers! My name is Lauren and it’s awesome to be back guest posting for my mom. When my mom asked me if I wanted to share a recipe while she was away, she left specific instructions for me to do something healthy. This month is the time for healthy eating (you know, New Years resolutions and all.) Originally I was going to rebel and post some outrageous cake from the amazing vintage cakes cookbook I got for Christmas this year, but I decided to be a good daughter. 

  Let me share a little something about my kids. More specifically my son. They eat three meals a day and snack like I starve them. This boy eats more food than me and sleeps 13 hours a night. I swear he wakes up every day a half and inch taller. I’m always on the look out for quick, healthy snacks that will fill them up. Thats why these date nut bites are perfect.

  As an added bonus there are only three ingredients and this might be the easiest recipe you ever make. The end result is a delicious, sweet snack that leaves you satisfied.

Image

 Ingredients:

1 pound pitted dates 

1/2 cup walnuts

1 cup coconut, preferably unsweetened

Image

  Place pitted dates and walnuts in a food processor and puree until smooth.

Image

  Take 1 tsp of the date/walnut mixture and roll into balls.

Image

  Place the coconut on a plate. Roll the balls in the coconut to cover the entire outside of the balls.

Image

  Enjoy! 

stained glass cookies (or, how to impress your friends with your mad baking skills without actually baking)

This is the part wherein I preface by saying that I don’t ever eat any artificial anything.

That is, for the most part, true; however, I have been known to steal the occasional Tootsie Roll from my kid’s Halloween bucket and I really like to order dessert when I go out for dinner (and sometimes I may not know precisely what is in it!). Like a few other recipes I’ve posted about, my mother made these every year at Christmas without fail.

But no…I don’t eat them.  These cookies belong to a small, select group of recipes that I make simply for tradition’s sake.  It’s not necessarily that I don’t like them.  They are seriously rich and delicious!  It’s that I had them so much growing up, I’ve lost the desire for them.  I can make them from memory and without much thought or labor, and they are consistently delicious.

The hardest thing about making these is finding the marshmallows.  It seems to get harder and harder each year.  I stress that they must be the Kraft brand.  Any other brand of multi-colored marshmallows will either have a different taste, consistency-or both.  My dear friend, Monica, who was on a speciality food item hunt of her, kept a lookout wherever she went until the quest was over.  A new Wegman’s opened up the street and Lo!  There they were (I had already begun telling people not to expect them this year).  She also contacted Kraft food on Facebook, who suggested using their product locator to find them.

cookie rollstained glass cookies

One bag of Kraft multi-colored marshmallows

12 ounces semi-sweet chocolate (either squares or chips)

1/2 cup unsalted butter (one stick)

1 cup chopped walnuts

In a double boiler (if you have one, if not a medium saucepan will work-just keep a close eye) over low heat, melt the butter.

Add chocolate, stirring constantly until completely melted and is a velvety consistency.  As soon as the chocolate melts, remove from heat to cool for a few minutes.

Toss marshmallows and walnuts together in a large bowl.  Add melted chocolate mixture and fold gently until incorporated.

Lay out aluminum foil pieces on counter and form logs.

Makes 2 very large logs or 3 smaller ones.

Wrap tightly with foil and refrigerate at least 2 hours before slicing and serving.  Store in refrigerator.  These freeze well if you want to make them far in advance.

stained glass cookies

mom’s brownies

This week!  Am I right?

Our family made it through Hurricane Sandy unharmed.  We never even lost power.

It saddens my heart to watch the news and see what some folks in the upper east coast states are having to endure.  Many have lost much and so many people are still in the dark.

Jenn over at Jenn Cuisine has asked food bloggers to unite this week and post a recipe that “you would make for someone in need, to help them feel at home”…a comfort food, if you will.

The initial recipes that came to mind were chicken pot pie or this chicken soup.  And of course, everyone likes pie.

Continue reading

apple hand pies

As I sit and start writing this post, Hurricane Sandy is paying us a visit.

An uninvited guest, she imposes herself with pounding rain and wind gusts the likes of which I’ve never seen or heard.

We have moved the lawn chairs indoors and we have placed the potted herbs snug against the house.  We’ve purchased bottled water, as well as beer, in case of extreme emergency (we have our priorities!).  The batteries have been replaced in the flashlights and camping lanterns.

We have hunkered down and snuggled in.

Continue reading